In this lab, you will:
print() to print messages to standard outputinput() and store it into variablesPython is a programming language which has gradually become one of the most popular languages in the world. It’s not hard to see why: the strengths of Python lie in its accessibility and its large standard library. This means that non-programmers often choose Python as their first language to learn. Its syntax (that is, the keywords and symbols used to define how code works) will remind you of plain English, and allow you to focus on grasping some of the fundamental concepts of programming rather than on punctuation.
Python 3 was released in 2008. One important thing to note is that there are large differences between Python 2 and Python 3, so we will need to make sure that we aren’t using the older version of Python.
IDLE is a great way to get familiar with Python, but as we proceed in the course we are going to find that IDLE is too limited. VS Code is an open source text editor with a wide array of extensions that benefit programmers. Follow the steps to install VS Code below:
Ctrl+Shift+x. Enter “Python” into the search bar and install the first extension you see.It’s also recommended that you create a directory for your course files. This can be named whatever you like, but you should probably also create a “Lab 1” directory inside of it to keep things organized. Organization is very important for programmers 😅.
>>>> waiting for your input. Type print('Hello World') and press Enter. Congratulations, you have printed your first string!A string is a series of characters entered from a keyboard. In this case, our string is Hello World. Strings can also contain numbers and special characters such as (&%$#). You can’t do math with strings, but you can print them to a screen. The string is our first data type. There are others that we will introduce further on in the course.
For now, remember that strings need to be inside either single quotes (’’) or double quotes ("").Use print() again and enter another sentence of your choice.
print() is a built-in function used to print output to the screen. Programmers use a particular vocabulary to talk about functions: the things we put inside the parentheses are called arguments. They modify what the function will do. In the case of print(), we expect only one argument, and that argument should be a string.x = input('Enter your name: ')input() is another example of a function. Again, you can enter a string as an argument and it will be used to prompt the user for input. input() will also return something. Whatever is returned by a function, needs to be stored inside a variable. We have named our variable x, but this isn’t a very good name. Let’s change it.x = input('Enter your name: ') command and replace x with user_name.print(user_name)user_name) with whatever you typed in.print("Hello" + user_name)You will probably see something similar to this:
HelloEricuser_name, put another plus sign, then an exclamation mark enclosed in quotes. It does not matter if you use double quotes or single quotes. Your new print statement should look something like this:print("Hello " + user_name + '!')…which should give you the following output:
Hello Eric!I’ve combined double quotes with single quotes. This doesn’t matter, as long as every opening quote has a matching closing quote. (eg. Entering print('Hi") will not work).
Note: When naming things in Python (including variables), keep in mind the following rules:
print) are reserved for the Python programming language and cannot be used.So far, we have been interacting with the Python Interpreter, which is a way of saying that we are entering code, and Python is translating each line of code into instructions. This is useful because we get immediate feedback from the interpreter: if there is a problem with our line of code, we will know immediately.
The next step will be to enter our code into a file, so that we can save our instructions and have Python repeat them whenever we need. We often call these files programs or scripts.
By script we simply mean a short computer program meant to perform a simple task quickly. The Python Interpreter is still translating your code, but this time your code has been saved in a file, and will be executed like any other program on your system.
File and select New File.
'''
Name: Your name here.
Student ID: Your nine-digit seneca ID.
Description: This is our first program.
'''

print("Hello World!")
user_name = input("Please enter your name: ")  # asks user for input
print("Hello " + user_name + "!") # prints user name in a friendly way.lab1a.py.Note: the .py is called a file suffix, and is used to identify what kind of file this is. This isn’t like a normal text file, so it shouldn’t be named with a .txt! Identify this as a Python script by ensuring that .py is at the end.
Run -> ‘Run Module’. Make sure that your first script is running successfully and doing what you expect it to do.''' didn’t affect anything, nor did the words coming after the #. These are examples of comments. Comments are used to document code in various ways.Believe it or not, but being able to write good comments is a crucial skill for programmers. Often we return to old code that we have written, and it can be difficult to understand what we wrote and why. Comments are a way to describe why we have written the code that we have. For this course, you will be graded partially on the quality of your code comments.
All of our Python work will be inside these .py files. We will soon be writing scripts of such complexity that we will require better tools than IDLE can provide. So let’s make sure that our first script runs inside VSCode.
If you haven’t already, start up VSCode.
Use the “Open File…” dialog to find your lab1a.py and open it. You should see a screen similar to this: 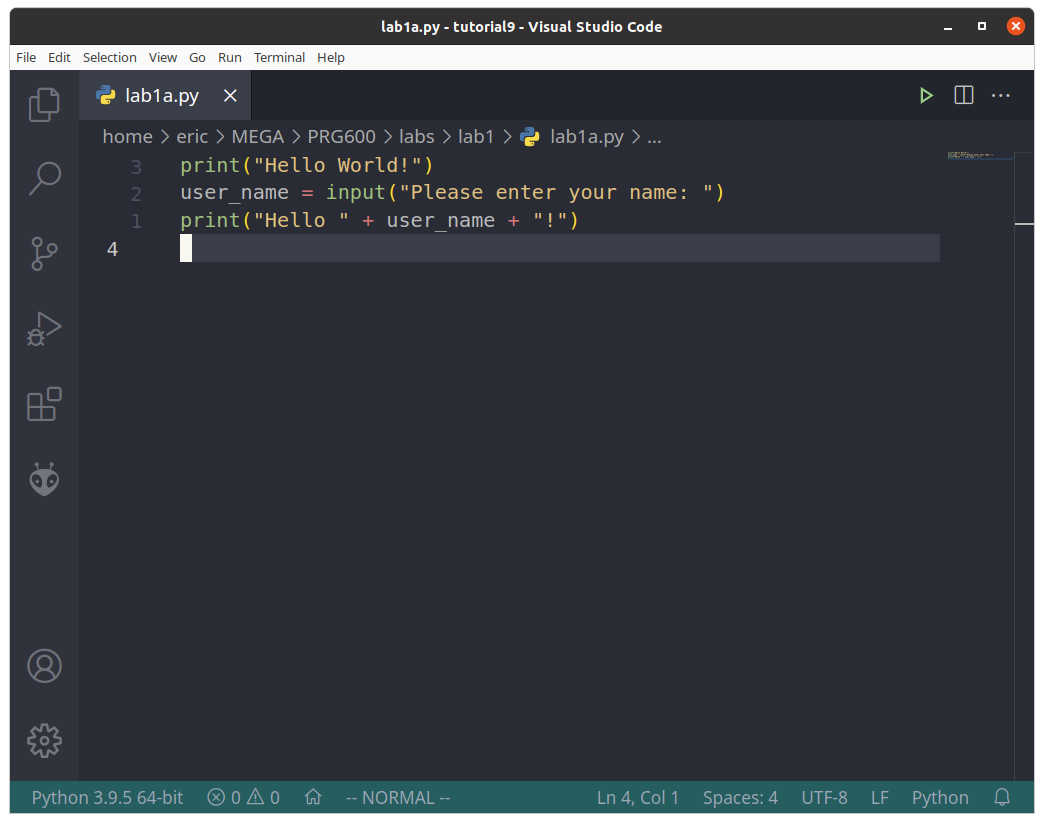
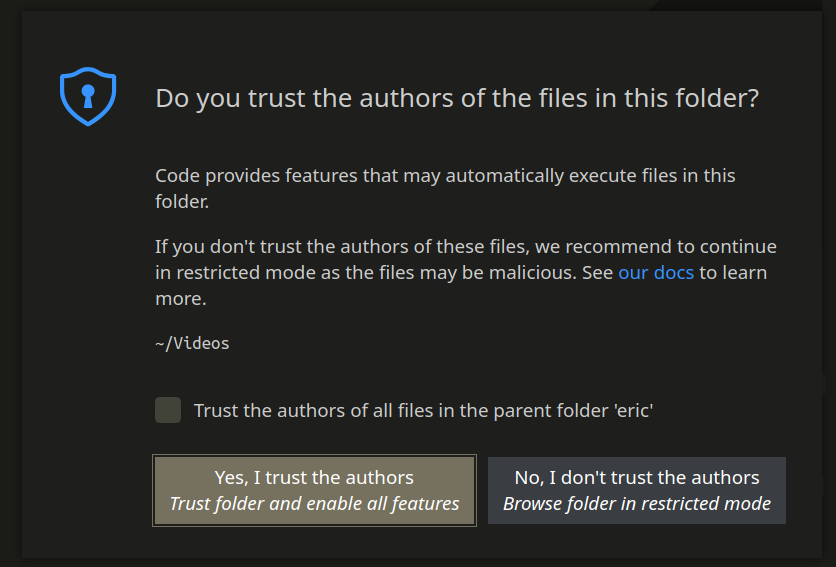
On the left side, find the “Run and Debug” button or press Ctrl + Shift + D. Click on the "play button to launch your program.
You may be asked to select a configuration. Make sure to select ‘Python’ from the list. If all is well, you should see a screen like this:

Note: If you are not seeing the Python script at this point, contact your professor. We are going to be using these tools for all of the next labs and assignments, so if there’s an issue it’s better that we resolve it sooner rather than later!
For this lab, you can use a check script that will verify that your files are printing the correct output. Here are the steps for using the check script:
You will now be asked to create a new script. Your script must fulfill the following requirements:
lab1b.py.''') with your name and student ID.input() and print() statements to re-create the dialog below. Your script will also run without errors.Welcome to PRG600!
Enter your name: Eric
Enter your student ID: 123456789
Enter your age: 41
Enter your favorite food: pizza
Eric is 41 years old and loves to eat pizza!
Good luck with the course!
check-lab1-output.txt.To complete the lab, you will need to submit the following to Blackboard:
Congratulations! You have completed the first lab.