
In this lab, we will be introducing two very important modules in the standard library: re and os. re contains functions to implement regular expressions, whereas os is used to interact with your computer in various ways. Remember that the Python standard library is extensive and contains many useful modules for a variety of tasks. You can view a listing of the modules here.
While we can’t predict everything you’ll eventually do with Python, chances are that the tools we introduce here will be of some use to you at some point. Python is a generalist’s language, and generalists often need to perform pattern matching and general organisation/maintenance of their operating systems.
Regular expressions are a way of matching not just a specific word, but a pattern of characters. For example, an email address, a date, or a telephone number.In each case, the specific numbers or characters will be different, but we will expect to a see these characters in a particular pattern. A Canadian date often is in the pattern DD-MM-YYYY, where DD indicates the date, MM the month, and YYYY the year. The pattern we see is two digits plus a dash, two digits plus a dash, and then four digits.
Consider next a telephone number. In Canada we often drop the international country code and will recognize both XXX-XXX-XXXX or (XXX) XXX-XXXX as valid telephone numbers.
In applications such as browsers or word processors, searching for a specific date is easy, but searching for something that looks like a date is much more difficult. Regular expressions are an excellent way to pattern match.
For regular expressions (or regex), it can often be useful to use online tools to help visualise what’s going on. I often recommend Regex 101 as a good place to start. Regex has its own syntax which you must learn, but once you’ve learned it you can apply it in more places than you think!
\d.\ds followed by the literal -.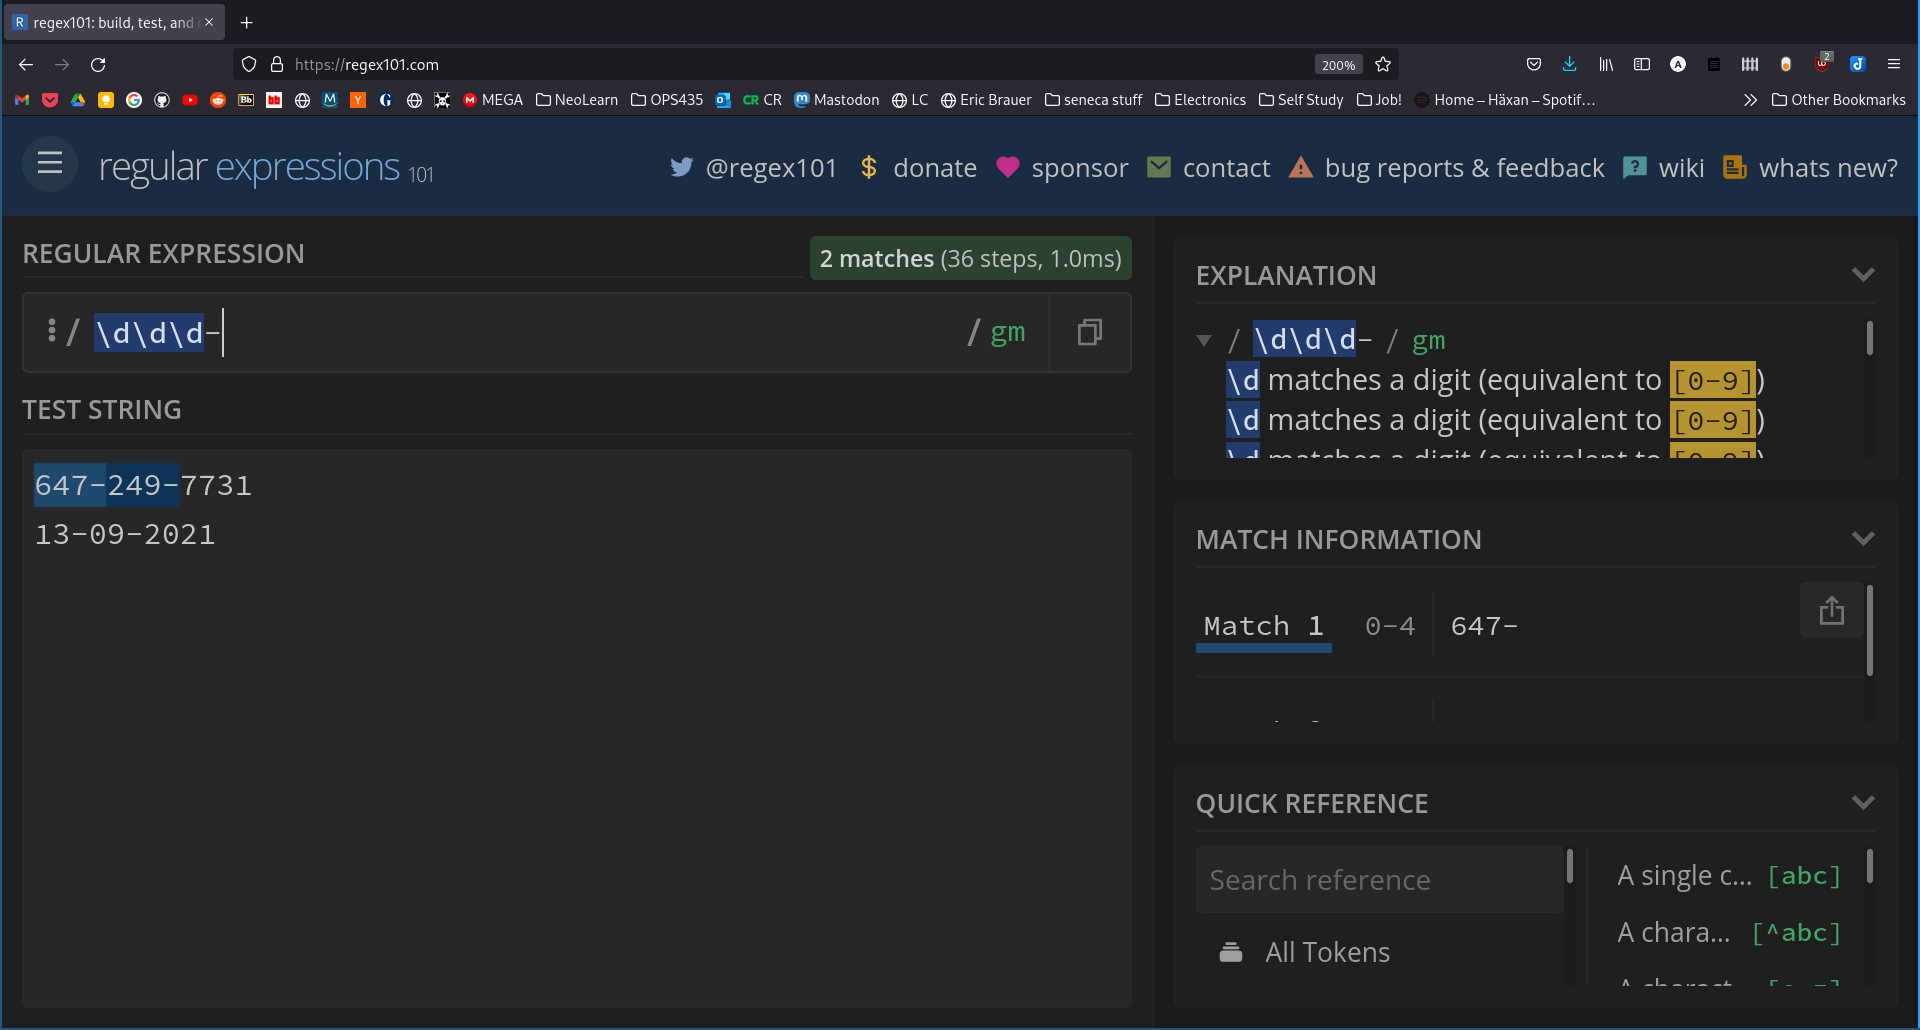
Note:
There are other symbols to indicate word symbols (usually a-z), whitespace symbols, (usually a space or a newline character), and a symbol to define boundaries of words.
\w: includes alphabetical characters\s: includes spaces and the end of a line\d: includes numbers\b: specifies the boundary of a wordYou can also exclude these characters by specifying the capital:
\W: any character that’s not alphabetical\W: any character that’s not a whitespace\D: excludes numbersThe boundary character will help filter out situations where your regular expression is matching characters inside of a larger word.
Al.\b to the end of your regular expression.l. This can be useful if you’re only searching for Al.re Module: Using SearchNow we are going to use this regex pattern inside Python. Enter the following into a new file called lab8a.py.
import re

tel_num = re.compile(r'\d\d\d-\d\d\d-\d\d\d\d')
mo = tel_num.search('My telephone number is 555-877-5678. Or you can reach me on my cell: 555-212-0771. Call me!')
print('Found phone number: ' + mo.group())
compile will take our regex pattern and create an object. search is a method for this regex object that contains our “Test String”. group will display the entire match.r in front of the regex pattern we pass to compile. This indicates that the string is ‘raw’. As you probably saw when we worked with newline characters, \ has a special meaning outside of regex. It’s an escape character. In order to print the backslash that we need, we could omit the r and type in \\ for each digit. But as you can probably see, it’s much easier to use the r.You will probably find that using \d\d\d-\d\d\d-\d\d\d\d is quite awkward. Instead of repeating the \d symbol for each digit, we can re-write our regular expression to use a quantifier. Following your symbol with a number inside curly braces {} will specify the number of times that the symbol preceding should be found.
The first part of our phone contains three digits. We can replace \d\d\d with \d{3}.
Note:
You can expect to see a lot of ways of specifying quantities of symbols. Here are a few:
{1,3}: This specifies a range, from one character to three characters. Please note that by default it will try to match the maximum number of chracters.?: 0 to 1 characters+: 1 or more characters*: 0 or more charactersIt’s recommended that you use Regex101 to help you complete the following task. Put the regular expressions into a file called regex.txt. Include a regular expression that will match:
In addition, for each of these regular expressions, include some test input that you used to test. You should using test input that should pass (ie. it will match), and input that should fail.
As you noted before, re’s .search method will only return the first match it finds. In order to match all instances of the pattern, we will use a different method: findall. The difference between these methods is what they return: findall a list of all matches.
import re

tel_num = re.compile(r'\d{3}-\d{3}-\d{4}')
mo = tel_num.findall('My telephone number is 555-877-5678. Or you can reach me on my cell: 555-212-0771. Call me!')
for match in mo:
print('Found phone number: ' + match)So far our regex has included literals (has to be an exact match) and classes of symbols (number, letter, or whitespace). We can also specify certain symbols by enclosing them inside of square brackets []. For example:
[aA]: matches a single character that is either a small ‘a’ or a capital ‘A’.[a-z]: matches a single character that is between ‘a’ to ‘z’.[a-zA-Z-_]: matches, again, a single character that could be an alphabetical letter, or a dash, or an underscore.You can invert the logic of the square brackets (ie. exluding characters) by putting a ^ inside your brackets at the very beginning. In addition, you often see these ranges used with a quantifier which you have already learned.
[^aA]: matches a single character that is not an ‘a’ or an ‘A’.[^0-9]{3}: matches three symbols which are not numeric.[aeiou]+: matches one or more vowels.Open your regex.txt file and append one new regex to the end of it. This regex should match only with Python variable names that abide with best practices. As a reminder:
As before, include test input that you used to test this regex.
For this task, you will be creating a script called lab8b.py. We will provide you with a sample file to be searching.
findall to match all phone numbers contained inside the file.A test file for this assignment can be downloaded here.
By this point you’ve become familiar with many shell commands for your preferred platform: Windows uses Command Prompt or Powershell, and Mac/Linux will most often use the Bourne-Again Shell (BASH). For example, I am using Linux, and this is how I would get my current username:
eric@archie ~ $ whoami
eric
Oftentimes using shell commands such as these are easier than using a graphical user interface. Occasionally they are the only way of performing a certain task. There are two methods by which we can easily execute shell commands inside of a Python script.
The first method is useful when we require no output from the command, except to maybe ensure that it was successful. For example, in Linux I can use the cp command to make a copy of an important file. If the command is successful, there is not message printed to standard output.
eric@archie ~ $ cp lab8a.py lab8a.py.backup
eric@archie ~ $
We can accomplish this in Python using os.system. Remember that we will need to import os before this works.
x = os.system('cp lab8a.py lab8a.py.backup')
print(x)cp with the appropriate Windows command. Shell commands are not portable. In other words, a shell command will only work on the platform it was designed for.lab8a.py, since we are using relative filepaths. It’s always preferable, when possible, to use absolute filepaths, since it won’t matter where your script has been saved.x should be zero. This is because the value that os.system is returning contains the exit code of the command that you ran. Remember that exit codes are returned by all of the important shell commands of all platforms. zero indicates success, and non-zero usually indicates a failure of some kind.cp gorilla.txt. This should fail either because gorilla.txt doesn’t exist in this directory, or because your command is missing an argument. Check the value of x.x was 256, and not 1. This is because the output value contains more information that just the exit code. For now, it’s enough to know that x will equal 0 when the command succeeds, but non-zero when it fails. This zero/non-zero pattern will allow us to use x as if it were a True/False boolean value.if x:
print('Command failed.')
else:
print('Command succeeded.')One limitation of os.system is that we cannot use the output of a command inside of our Python script. While you will see messages printed to your terminal, they are not ‘visible’ to the Python interpreter.
x = os.system('whoami')
print(x)  # only 0 gets printed, not my username.
In order to use the output from a shell command, we need to use os.popen. There is one additional step: os.popen returns an object, and we can only view the output when we call the .read() method on that object.
f = os.popen('whoami')  # f is an object, not a readable datatype.
output = f.read()  # will contain the output from the command.
print("Hello " + output + "!") # Hello eric!lab8c.py.ping to test this. On Linux/Mac, you can use -c 4 to limit this to only four pings before quitting. On Windows, use \n 4.ping will require an IP address to test. We can usually rely on Google to be reachable, 99.9% of the time, if this ping fails, it’s because there is a connectivity issue on our own end, rather than Google’s!ping will return zero if all pings succeed, and non-zero if there were failures. Print an appropriate message based on what gets returned.whoami to get this.uptime on Linux, or systeminfo on Windows.Welcome, eric.
The Internet is UP.
uptime is:
17:58:43 up 19 days, 2:47, 1 user, load average: 0.36, 0.39, 0.45Note that your uptime output will vary depending on your platform.
os.pathAs you have noticed, running shell commands are most useful when you can guarantee that your script will only be run on a certain platform. However, as much as possible we want our scripts to be platform-agnostic. This means we should limit the use of shell commands when we have other alternatives at our disposal.
The os module contains a lot of additonal tools for working with files and directories in particular. These commands should work regardless of the operating system that you are using.
Consider the method of getting your current working directory on either Windows or Linux. We can replace this shell command with an os function, as seen below.
import os

print(os.getcwd())os Module Using help()Recall further the types of file operations we often perform using shell commands:
In the interpreter, import os, then run the command help(os). You will see that the documentation of os and all of its submodules is quite long. Enter / and enter a search pattern: for example enter /mkdir and see if the module contains a function to create a directory.
One of the most common things we need to do in the shell is look at the contents of our current directory. In Windows, we use dir and on Linux/Mac we use ls. We often refer to this when we are going to modify files or directories.
When writing a script, we often want to see a list of all files or directories, in order that we can automate certain tasks we want to perform on them. For this type of task it is useful to use os.walk. This method will list the contents of a directory we specify in a recursive manner. That is, it won’t just display the files or directories in the current location. It will display files for the current directory, and then for each subdirectory in the current location, it will display the files in the subdirectory, then for each sub-subdirectory, it will display the files there, and so on. Recursion is an important concept in computing. Here, it means that we are repeating an action for each subsequent object.
Let’s consider an example. Currently I am using Linux, and my current directory looks like this:
lab8.md
resources/
lab8.md is a file, and resources/ is a directory. If I move up to the parent directory and type ls, I will see this:
eric.css
html/
lab1/
lab2/
lab3/
lab4/
lab5/
lab6/
lab7/
lab8/
testing.py
update_script.sh
word-counts
Notice that we don’t see lab8.md anymore, since it is contained in the subdirectory lab8/.
Recursive traversing of filepaths is incredibly useful whenever we want to organise a location, search for certain types of files, and countless other maintenance jobs that are common in the workplace.
os.path MethodsSave the following file as lab8d.py:
import os

course_dir = '.'

print('Your current directory is: ' + course_dir)
Run the script. You will get the output:
Your current directory is: .Right now we are using a relative path, using the . symbol which in Linux represents our current directory We should consider converting this into an absolute filepath since this will be safer in most cases.
import os

course_dir = '.'

print('Your current directory is: ' + os.path.abspath(course_dir))
Your current directory is: /home/eric/prg600/labs/lab8For Windows, your absolute filepath would look similar to this:
Your current directory is: C:\Users\eric\prg600\labs\lab8The os.walk method takes a target directory as its argument and returns a 3-tuple, which for our purposes means we have 3 results to work with.
import os

course_dir = '.'

for root, directories, filenames in os.walk(course_dir):
    pass
Here we are using our current directory, which in Linux is represented by .. The method returns root, directories, and filenames.
You will notice that we are not doing anything in the loop at the moment. Make the following changes to your script:
import os

course_dir = '..' # changing to the parent directory

for root, directories, filenames in os.walk(course_dir):
    for directory in directories:
        print(directory)
I have changed the course_dir variable to .. so that I can see the lab1, lab2 ... subdirectories. You may wish to change this variable to a location where many subdirectories exist, so that you can see this loop works. Refer back to my example above to understand the output here.
lab3
html
lab8
lab1
lab7
lab6
lab4
lab5
lab2
resources
resources
resources
resources
resources
resources
resources
resources
resources
What we are seeing here is not only the subdirectories in this location, but the sub-subdirectories as well. Recall that lab8 has a resources directory in it, what you are seeing is that each of my lab directories has a similar pattern.
This output is confusing, since we have so many directories named resources. We will combine root and directory using another method called path.join.
import os

course_dir = '..'

for root, directories, filenames in os.walk(course_dir):
    for directory in directories:
        print(os.path.join(root, directory))
Output:
../lab3
../html
../lab8
../lab1
../lab7
../lab6
../lab4
../lab5
../lab2
../lab3/resources
../html/resources
../lab8/resources
../lab1/resources
../lab7/resources
../lab6/resources
../lab4/resources
../lab5/resources
../lab2/resources
Finally, let’s explore how os.walk will list our files. Make these last changes to lab8d.py and remember to submit it with your lab:
import os

course_dir = '..'

print('Your current directory is: ' + os.path.abspath(course_dir))
for root, directories, filenames in os.walk(course_dir):
    for file in filenames:
        print(os.path.join(root, file))
Which yields:
Your current directory is: /home/eric/prg600/labs
../word-counts
../eric.css
../average-words-per-lecture.sh
../lab3/lab3.md
../lab3/lab3.html
../lab3/resources/vscode5.png
../lab3/resources/vscode3.png
../lab3/resources/vscode2.png
../lab3/resources/vscode1.png
../lab3/resources/vscode4.png
...
<very long output is truncated>
Try removing the root from each filepath, and see what remains.
lab8e.py.os.path module for ways to check if a string is a valid directory.backups exists as a subdirectory of the user-defined filepath. If it doesn’t exist, create it.os.walk..py). Use whatever method you like to verify this.backups directory.Some things to keep in mind:
os provides to you. You will need to research the shutil module, which contains more functions. A function called copy() can be found there. As always, take at least a few minutes to read the docs!os.system for this task.os for help!As always, you can check your work using the provided check script.